
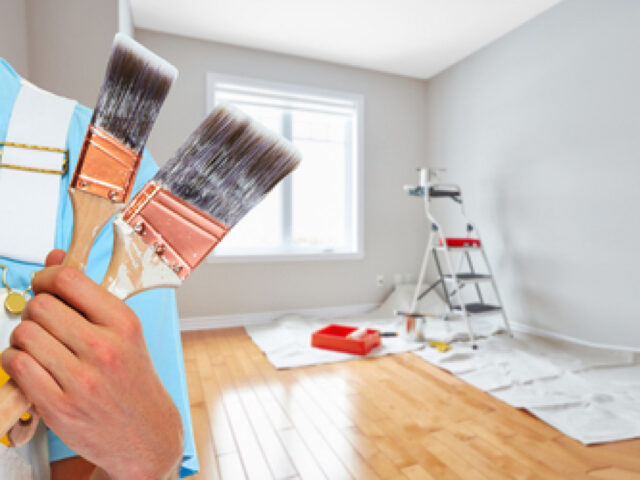
Painting interior walls can be very creative – and you’ll surely enjoy choosing colors to enrich and beautify your living space. This is one of the best ways to make your home your oasis where you can enjoy your free time. You may have never thought in that direction, but the colors that surround you can greatly affect your mood.
Brighter rooms will make you feel better and that’s why the color you choose for your interior is so significant. This is, unfortunately, just an interesting side of the painting process – there are still those less exciting ones. In order to achieve the desired results and a perfect look, it’s crucial to do all the preparations that precede it.
Well, before you start looking for creative ideas on Instagram and Pinterest on how to design the walls of your interior, you should pay attention to the next steps that need to be taken beforehand. In case you’re interested in finding out exactly what you should pay attention to in order to get the perfect match, you’re at the right place. The answer awaits you in the lines that follow.
1. Cleaning
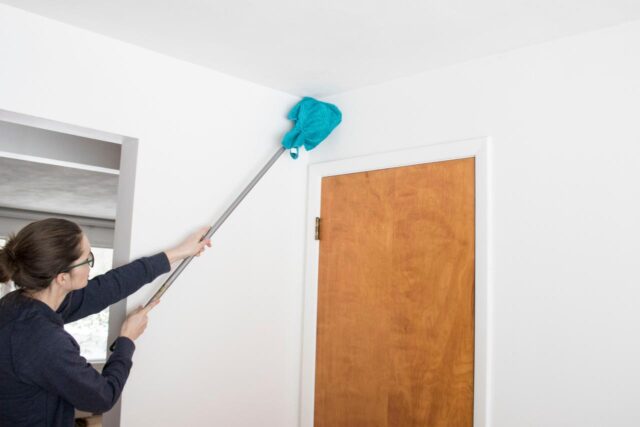
The first step in preparing all wall surfaces for painting has to be cleaning. You’ll agree that cobwebs, greasy stains or mold won’t be a nice sight for a painter at all, and you’ll probably leave the impression of being quite a messy person. It’s okay to want to freshen up the colors, but that doesn’t mean the worker should think you don’t own a vacuum cleaner in your household.
In this case, there’s no special advice that you haven’t applied to your regular cleaning so far. First, use a vacuum cleaner to pick up all the cobwebs and dust you find in the corners of the room. With the help of a sponge and warm water, you can remove dirt that’s relatively new and doesn’t have to wait for the roller to move. If the kitchen is the area you plan to refresh, then you’ll surely have to deal with greasy stains, so get a degreasing detergent, the remnants of which you’ll later remove with water.
Wipe everything with a damp cloth and allow it to dry. Drying is necessary to avoid problems with the formation of bubbles when applying the paint.
2. Mold removal
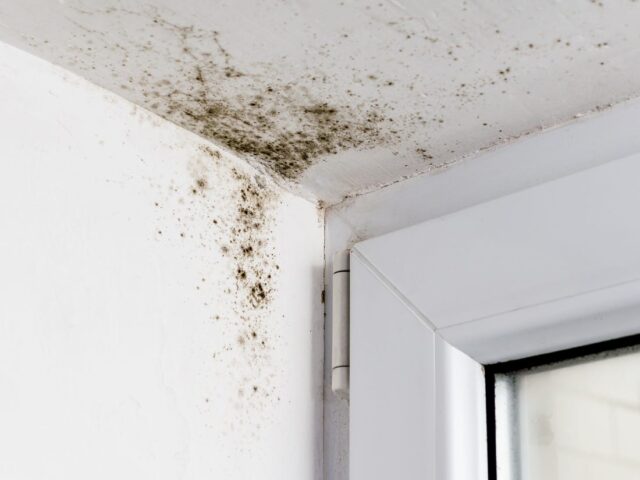
Water always finds its way out. This rule also applies when it comes to apartments and houses, where it often happens that moisture just appears and remains there. The owners find out about it only when they see wet stains on the walls. The root of such problems is usually quite difficult to detect and the solution takes a long time, during which time mold begins to appear even more. In addition to the fact that it’s very bad for health to sleep and stay in a room where there’s mold, there’s also the spread of unpleasant odors. We’re sure that you don’t want to host anyone in a house where everything stinks of moisture.
Be sure to pay attention to mold and don’t ignore this problem. Many recommend that you simply repaint them and move on, but this is neither healthy nor aesthetically acceptable because there is always a risk that traces may appear on the newly colored room.
It would probably be better to accept the following advice – you can clean the green stains with a solution made of bleach and water. After the solution has been set after a few minutes, the affected surface needs to be rubbed with a soft brush and then rinsed with water. Once this has dried, you can move on to the next steps. At this stage, you’ll probably need protective equipment.
3. Remove old paint layers and wallpaper
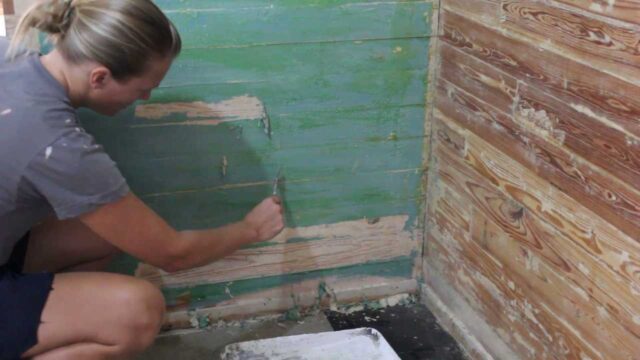
Cracked surfaces are a specific problem that needs to be solved before starting work. For the new colors to look as good as possible and for everything to be perfect, the walls should be completely flat, without cracked parts and remnants of the old paint that’ll be visible later and that’ll ruin all previous work.
On the other hand, if you have used wallpaper so far and now want to put it out of use or replace it with a newer, more modern one or one that you like better, there are some rules that need to be taken into consideration. It isn’t recommended to cover old wallpapers with new ones. Especially if it’s a complicated texture. Instead, hire or ask to somehow help you get rid of the old ones.
Sandpaper or a paint scraper will be a necessary tool to remove cracked parts. For larger surfaces, an electric grinder would be a good solution. After removing the old plaster, fix the areas with fresh plaster. It would be good to leave the plastering to a professional such as SolidPainting if you aren’t an expert, to avoid poor preparation.
4. Protect surrounding surfaces and objects
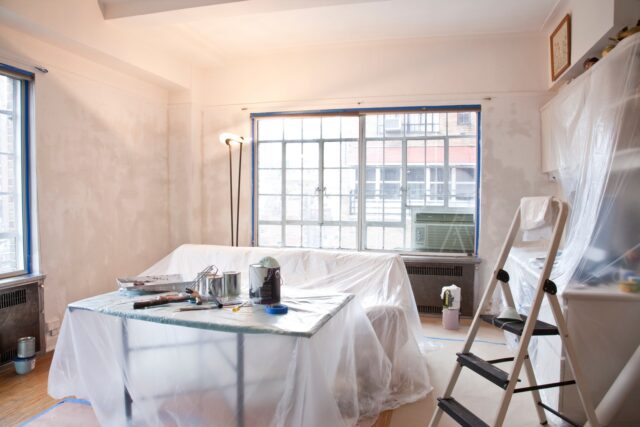
The crucial part of preparation before painting is the protection of all objects and surfaces in the room from splashes. We assume that your plan includes using the same furniture after this process is over, so it’s important not to forget to protect it from dirt and stains that are usually quite difficult to remove. We mustn’t even imagine how annoyed you might be if even a single paint drop falls on your light furniture, so it would be good to take preventive action.
You may not be able to take the furniture out of the room, but that isn’t a problem. Simply push it towards the center of the room and use nylon to cover it and protect it from flying stains. Secure the nylon with adhesive tape to ensure that it doesn’t move until the painting is complete. Don’t forget all the doors. They should also remain clean, so it’ll be necessary to stick the tape along the edges as well.
Conclusion
If you thought that simply rolling a roller on a wall is all that makes painting, then you’re wrong – and we believe you realize it after reading this article. Once you have decided which color combinations are perfect for your interior, it’s time to start with the preparations that precede the main part. Prepare all protective equipment, protect the furniture, and then apply all the previously mentioned tips. Will it be hard? Maybe. But you’ll enjoy perfect results for a long time, without unpleasant surprises from the appearance of stains, mold, or cracks.


