
If you reside in an apartment or if it is impossible to place a satellite dish on the roof of your building, there is something else that’ll enable you to enjoy your favorite TV dramas and movies – installing an indoor aerial. Nevertheless, if you have never placed one before, the entire process may be confusing, stressful, and time-consuming for you.
All of this might have led you to wonder – what is the simplest way for me to place an indoor antenna for my apartment? Well, luckily, the text below is going to feature a DIY guide for installing an indoor aerial during 2024. Let’s take a closer look at the things you’ll want to remember and do:
Step 01: Firstly, You Must Opt For The Best Device
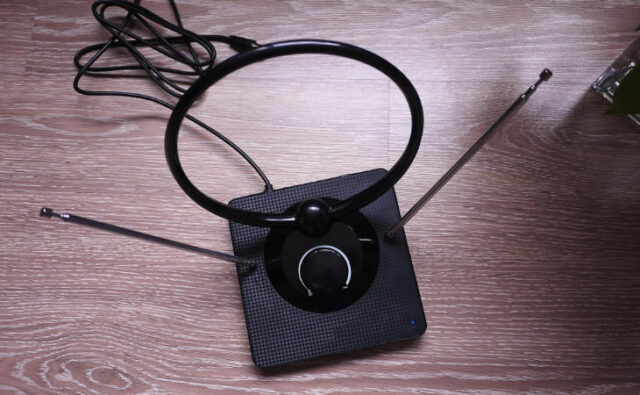
One of the initial things that you should know is that indoor aerials come in a wide range of designs, shapes, and sizes, which is why you’ll need to guarantee that you pick the correct one for your residence. Some of the devices that you can get feature an amplifier that’ll allow you to pick up better signals, while others will allow you to have a great picture.
So, before you choose the first option that comes up in your search results, you’ll want to do some digging, compare different options & features, and you’ll also want to compare the prices. Doing all of these things will ensure that you choose a device that will suit your needs and apartment.
Step 02: Start The Installation Process
Before you do anything else, you should plug in the satellite cable into the set-top box or into your television set. Now, some of the devices are omnidirectional which means that you won’t need to align them with your local broadcasting towers, but, most of the ones that you can get will need to be positioned vertically or horizontally.
If you are unsure where you should place it, look at some of the rooftop satellite in your area and determine in which way they are facing. Once you do, you can adjust your indoor aerial in order for it to face the right direction. Keep in mind that it is always better to place it higher, which leads us to the next point…
Step 03: Positioning The Device
When you are looking for the best placement for the device, you should switch to a Freeview channel such as BBC. When you find an available channel, you should pick up the antenna and start moving it slowly in order to see where the best reception is. According to the experts from MikeHarrisisAerialandSatellite, some of the best places to put the aerial is close to a window.
Now, if there is a lot of space between your TV and the location where you’ll place the antenna, you’ll need to purchase extension leads. The cables should have a “female” and “male” connector, however, if you cannot determine whether or not a particular cable has both, ask for some help from the clerks at the hardware store.
Step 04: Receiving The Channels

There are six categories of digital TV channels, which are most commonly referred to as multiplexes – all of which are transmitted at various frequencies. Having bad reception often means that you are missing out on a whole multiplex, which is something that you’ll want to avoid. Hence, check if you can some national channels since they function at different frequencies.
If you opt for the right device, it should allow you to watch at least two or three free-to-view channels. Naturally, the ones you’ll receive will depend on the location of your home. There are various websites that you can utilize for learning which programs you should receive, so, ensure that you use them.
Step 05: Secure The Device
Last on the list, but not least important is actually securing the device. Once you find the perfect location for the aerial one that will allow you to have good reception and a good signal, your next step is to secure it. You can opt for using adhesive Velcro pads or blu-tack since they are strong materials.
On the other hand, you might have chosen an antenna that can be wall-mounted, and if so, you’ll be able to secure it properly from falling down. Besides allowing you to easily secure it to your wall, it will also be easier to hide the device, which means that it won’t be as visible as other options.
Tips to Keep in Mind During The Installation
Before concluding this article, there are some tips that are worth mentioning, especially since they’ll allow you to reap all the benefits an indoor aerial can provide you with. For starters, you’ll want to position the device higher, and as mentioned, you can use extension leads if needed.
Additionally, you’ll need to ensure that you know the exact location of your local broadcasting towers. Why? Well, by doing so, you’ll know in which direction you’ll need to place your device, and in return, your signal, reception, and picture will be better and improved.
If there are any metal objects – such as appliances, home décor, or other items made from metal – you might want to remove them before you place the device. Metal is known to disrupt the signals traveling to your aerial, hence, you might want to consider removing them first.
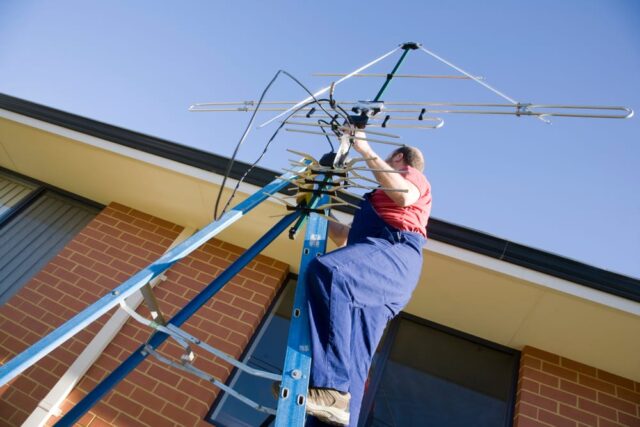
Lastly, if nothing else works, it might be best for you to hire a professional aerial installation company since the experts working there will know exactly where they should place the device, and more importantly, they’ll know exactly where it needs to be pointed in order to work efficiently and properly.
Conclusion
So, there you have it – you’ll need to go through all of the steps mentioned in the guide above. Not only will they ensure that you can watch TV after a long and tiring day at work, but, by following the guide, you can make the entire process easier, less time-consuming, and more importantly, less stressful.
Hence, now that you are aware of all the things you’ll need to remember and do, you should not waste any more time. Instead, you’ll want to go back to the beginning of this article, and start with the first step – which is ensuring that you opt for the right indoor aerial for your apartment.


