When you’re looking to produce high-quality parts for your models, you need to find a method that will yield accurate and consistent results. One popular technique is photo etching, which involves using a photoresist and a laser to create 3D images of the part to be etched. In this article, we’ll discuss the basics of photo etching and show you how it can be used to create parts for models.
History of Photo Etched Parts
One of the earliest uses was in the early days of photography when photographers used etching plates to create copies of photographs. Photo etching is also used today to create custom parts, tools, and furniture.
Photo etched parts are a relatively new form of model manufacturing, and they have been used in various industries for decades. In the early days of model making, most people made their models out of wood or plastic. However, over time, people began to experiment with other materials, including metal and even resin.
Photo etched parts are a type of model that is made out of a thin sheet of metal that has been etched with a series of small channels. These channels create the impression of individual pieces that can be assembled together to create a model.
Photo etched parts are typically used in the manufacturing industry. They are often used in the design and manufacture of products that need to be very precise and accurate, such as medical devices and aircraft parts.
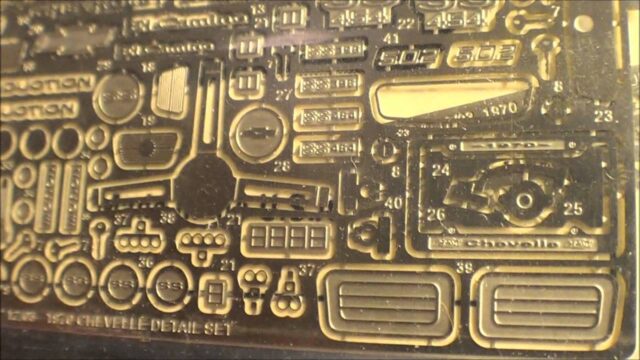
Photo etched parts have several advantages over traditional modeling methods. Firstly, photo etched parts are much more accurate than traditional models. Secondly, they are much easier to produce in large quantities. And finally, they are also much less expensive to produce than traditional models.
How are Photo Etched Parts Made?
When a model is made, often small details need to be precision cut from a large block of plastic. Often these details are carved from photo etched parts. Photo etched parts are made by etching small pieces of metal into a plastic part. The process is used to create intricate details and patterns on the surface of the part.
The process begins by designing the part in a CAD program. This file will include the size and shape of the detail as well as the locations where it will be placed on the part. Once the design is finalized, a mask is created to protect the part from being damaged during the etching process.
Next, a layer of plastic is placed over the detail and carefully printed with the patterned image. The pattern must be exact or else inaccurate details will be produced during etching. After printing, the plastic is hardened using heat or chemicals and peeled off revealing the engraved detail.
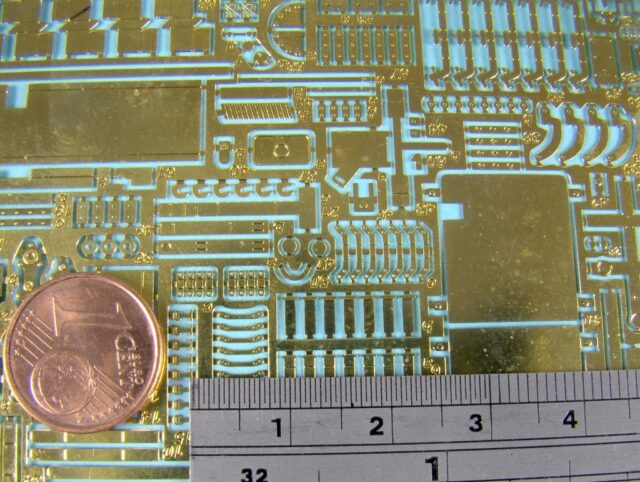
Photo etched parts are often used in models because they provide an accurate and intricate finish that can’t be achieved with traditional methods such as sanding and polishing. They are also popular for creating detailed patterns and textures that would be difficult or impossible to create with other methods.
Types of Photo Etched Parts
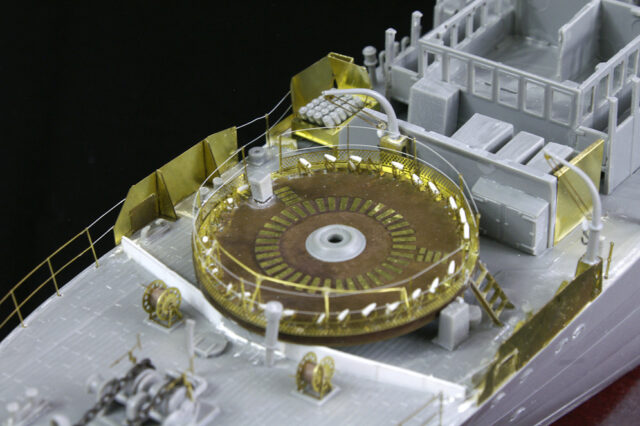
There are many types of photo etched parts. The most common is a part that is made to be adhered to a model. This type of part can come in many shapes and sizes and can be made out of plastic, metal, or even glass. There are also parts that are meant to be glued to a model. These parts are almost always smaller in size and come in different colors so that they can be more easily distinguished from the rest of the model. Lastly, there are parts that are meant to be painted and then covered in photo etched material. These parts are usually larger in size and come with more intricate details than the other types of parts.
Advantages of Photo Etched Parts
When it comes to creating realistic models, photo etched parts are becoming increasingly popular. There are a few advantages and disadvantages to using this type of part. Here are the advantages:
1. They can be very realistic looking. Unlike other types of parts that are either injection molded or cast, photo etched parts are made by etching away the desired features with a laser. This results in a much more detailed and accurate part.
2. They’re relatively easy to make. Most photo etched parts require only a computer and printer to create them. There is no need for expensive tooling or machinery, which makes them very cost effective.
3. They can be customized quickly and easily. Because photo etched parts are created by etching away the desired features, they can be modified quickly and easily without requiring any additional tools or equipment. This makes them ideal for creating custom models that need to be changed often or for creating models that are specific to a particular application or design.
4. They can be reused multiple times. Because photo etched parts are made from plastic, they can be reused multiple times without having to worry about damaging the part or its functionality. This makes them a cost effective and environmentally friendly way to create models.
5. They’re easy to store. Because photo etched parts are small, they can be easily stored in a drawer or on a shelf without taking up space in your workshop or office.
How to Make a Photo Etched Part?
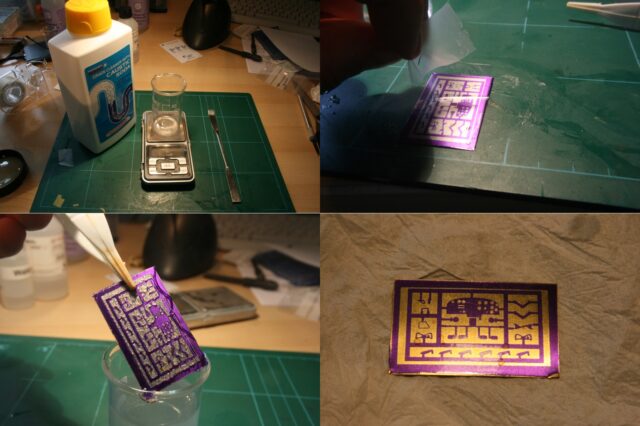
Making a photo etched part can be a fun and easy way to add some detail to your model project. The process is simple and you can create intricate details with minimal effort. Here are four tips for making photo etched parts:
- Choose the right material. Photo etched parts are often made from plastic or metal, but you can also use other materials like paper or card. The most important factor is that the material is flexible enough to deform under the etching process.
- Pre-etch the part. Before you start etching, it’s important to pre-etch the part with a design or pattern. This will help ensure that the etching process goes smoothly and that your final result looks accurate.
- Choose your etching tools and settings. Etching tools vary in how deep they can go and how sharp their tips are. Make sure to choose an appropriate tool for the task at hand and adjust the settings accordingly.
- Etch away! Once you have pre-etched the part, it’s time to etch away the unwanted material with a laser or inkjet printer. Be patient – it may take a few tries to get the results you’re looking for.
Conclusion
In this article, we will be discussing how photo etched parts for models are made. Etching is a process where a metal surface is chemically etched with designs or images. This type of manufacturing has been around for many years and is still used to this day in the production of model parts. The main benefits of using photo etched parts are that they are very accurate and durable. Additionally, because the parts are created by etching rather than casting, there is no possibility of them corroding over time.