
Norton antivirus software is a powerful tool for protecting your computer from various online threats, but there are instances when its active protection might interfere with certain tasks or consume valuable system resources. In such cases, temporarily disabling Norton antivirus can be a helpful solution. Here’s how to disable Norton antivirus on both Windows and Mac computers to ensure uninterrupted performance.
Disabling Norton Antivirus on Windows
Follow these simple steps to temporarily disable Norton protection on a Windows-based computer:
Login with Administrator Privileges: Ensure you are logged in with an Administrator user account. For Standard user accounts, some settings may appear disabled (grayed out). If you encounter this issue, you may need to use the Norton Removal and Reinstall tool.
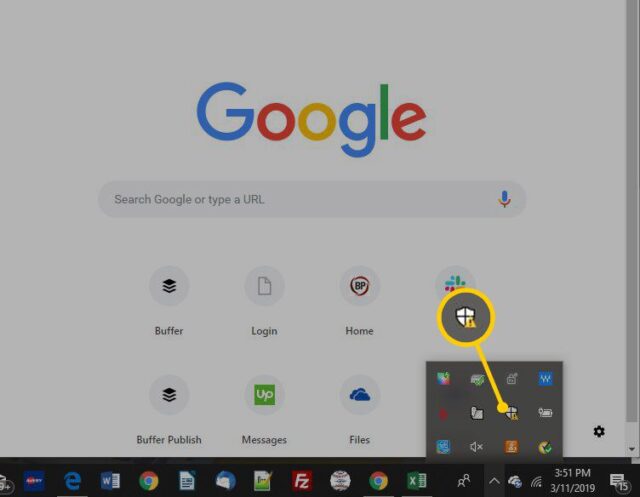
Access Norton Icon: Locate the Norton icon in the notification area on the taskbar, then right-click on it.
Disable Auto-Protect: From the context menu, click on “Disable Auto-Protect.” This will temporarily turn off Norton’s real-time scanning.
Disable Firewall: Similarly, click on “Disable Firewall” from the same context menu. This will disable Norton’s firewall protection for the specified duration.
Select Duration: In the Security Request window that appears, choose the duration for which you want to turn off Norton protection.
Confirmation and Re-Enabling: Click OK, and Norton will automatically turn on the features after the specified duration. If you wish to re-enable Norton before that, right-click the Norton icon again, and then click “Enable Auto-Protect” or “Enable Firewall.”
Turning off Norton Task Notifications on Windows
To disable Norton Task Notifications, follow these additional steps:
- Launch the antivirus software: Start Norton and navigate to the My Norton windo
- Open Device Security: Click on “Device Security” and then click Open.
- Access Norton Settings: In the Norton main window, click on “Settings.”
- Administrative Settings: Click on “Administrative Settings.”
- Disable Task Notifications: Locate the Norton Task Notification row and toggle the switch to Off.
- Apply Changes: Click Apply, and then click Close to save the changes.
Disabling Norton Antivirus on Mac
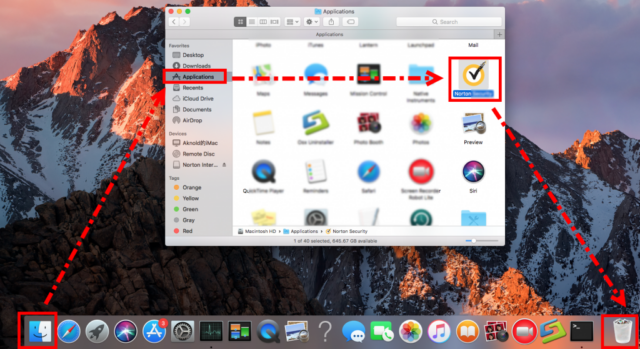
For Mac users, here’s how to temporarily disable Norton protection:
Open Norton: Launch Norton on your Mac, and if needed, click “Open” next to Device Security in the My Norton window.
Access Advanced Settings: In the Norton main window, click on “Advanced” or “Settings.”
Disable Automatic Scans: In the left pane, click “Protect My Mac.” Find the Automatic Scans row and switch it off.
Disable Firewall and Vulnerability Protection: In the left pane, click “Firewall.” Turn off the switches for “Connection Blocking” and “Vulnerability Protection.”
Re-enabling Protection: Once your task is completed, you can re-enable Norton protection by using the “Fix Now” option in the main window.
Conclusion
Temporary disabling of Norton antivirus can be beneficial when you encounter resource-intensive tasks or compatibility issues. By following the straightforward steps outlined in this guide, you can easily turn off Norton protection on both Windows and Mac systems. To improve security use computer monitoring software in your workplace. Remember to re-enable Norton after completing your tasks to ensure continuous protection against online threats. Regularly updating Norton and keeping its protection features active is essential to safeguard your computer and data from potential risks.


